Steps
Step 1
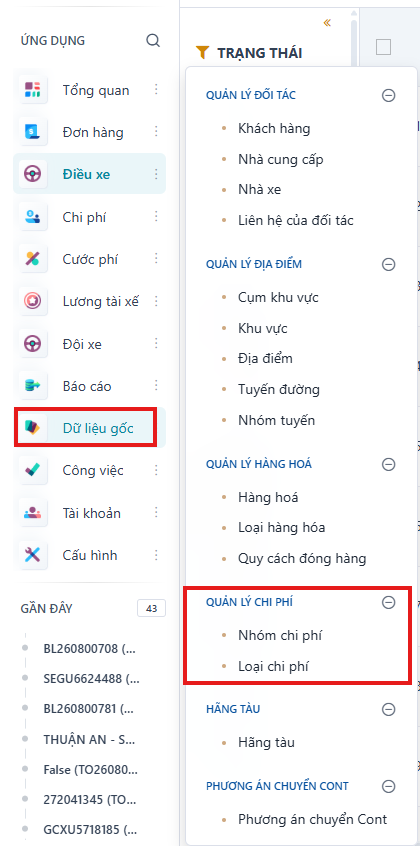
Go to the Cost types menu and click the create button.
Step 2
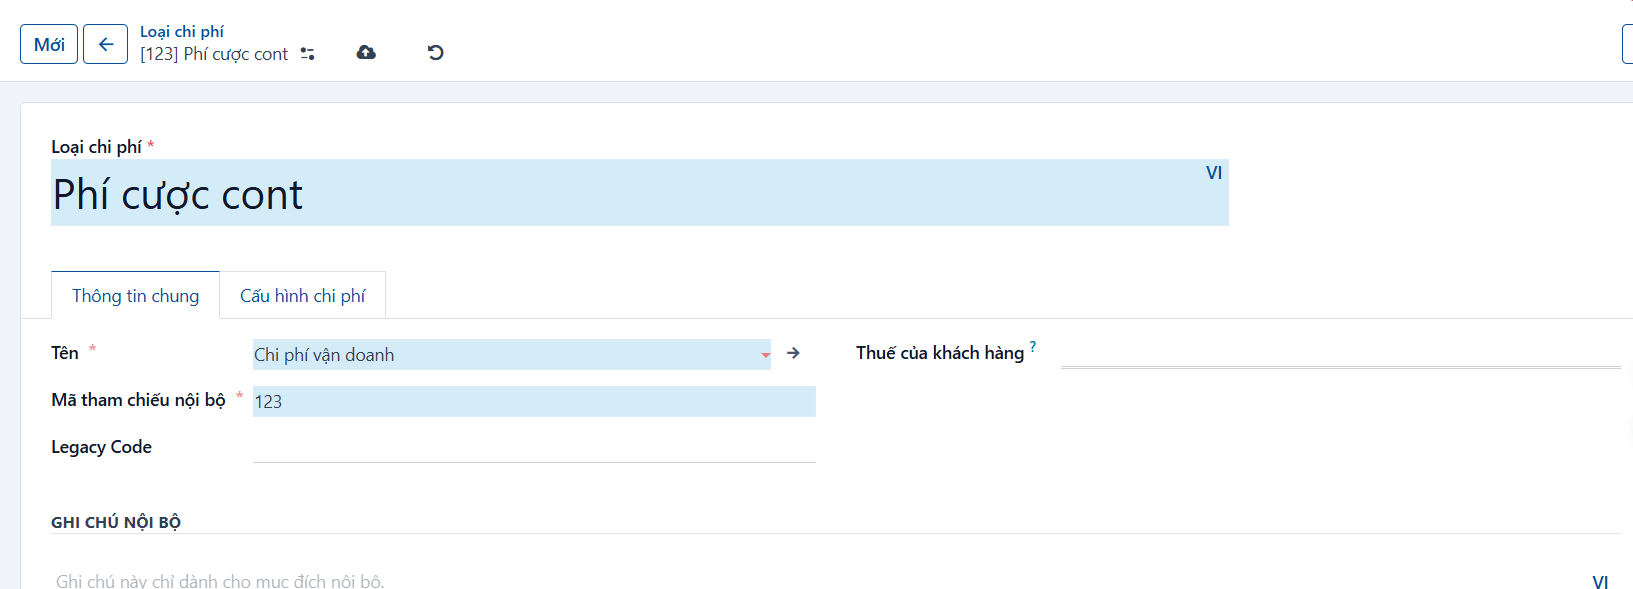
Enter the basic information:
-
Cost type: enter the name of the cost.
-
Cost group: select the cost group.
-
Internal code: enter the cost code.
-
Tax: select the VAT type. When this cost type is recorded, the system calculates the default tax amount from the tax type configured here.
Step 3
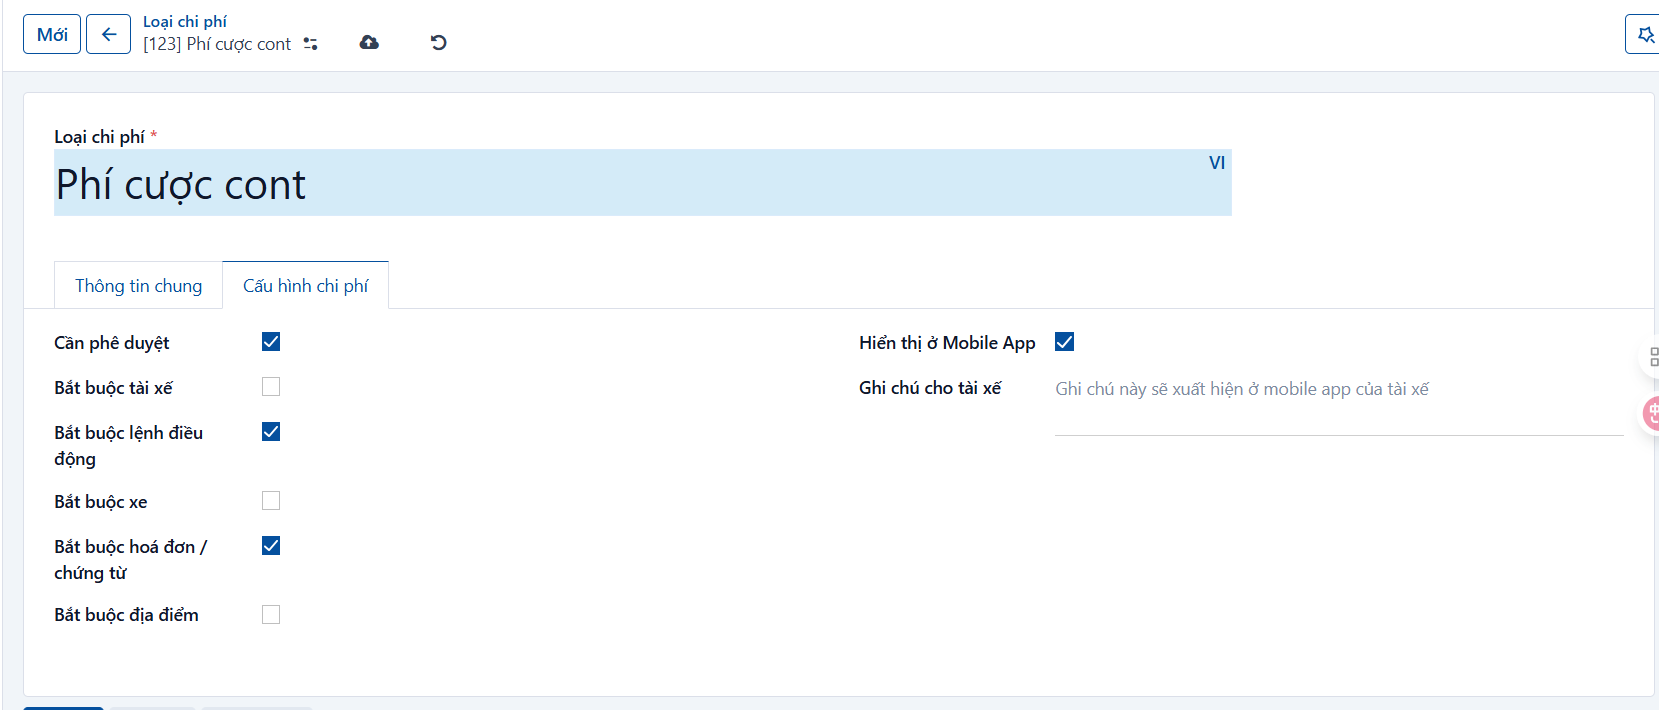
Open the [Cost configuration] tab to add some more advanced settings:
-
Needs approval: tick this if a dispatcher has to approve the cost after a driver creates it.
-
Driver required: tick this to manage the cost type per driver. When a cost is created, the system requires the driver who incurred it.
-
Dispatch order required: tick this to manage the cost type per dispatch order. When a cost is created, the system requires the dispatch order it belongs to.
-
Vehicle required: tick this to manage the cost type per vehicle. When a cost is created, the system requires the vehicle that incurred it.
-
Invoice or document required: tick this if an invoice or document must be attached to the cost.
-
Location required: tick this to manage the cost type per location. When a cost is created, the system requires the location where it was incurred.
-
Show in the mobile app: tick this if you want the cost type to appear in the Mobile App, so drivers can create it. If you leave it unticked, only dispatchers can create this type of cost.
-
Note for the driver: this note appears in the driver mobile app when the driver records this type of cost.